
SEO GuidePersonal BrandCreator IPExplainer Reels
Personal Brand Funnel Design: Reel → Lead Magnet → Offer
To create an effective personal brand funnel, you need to design a three-stage process that aligns with your audience's needs and provides value at each…
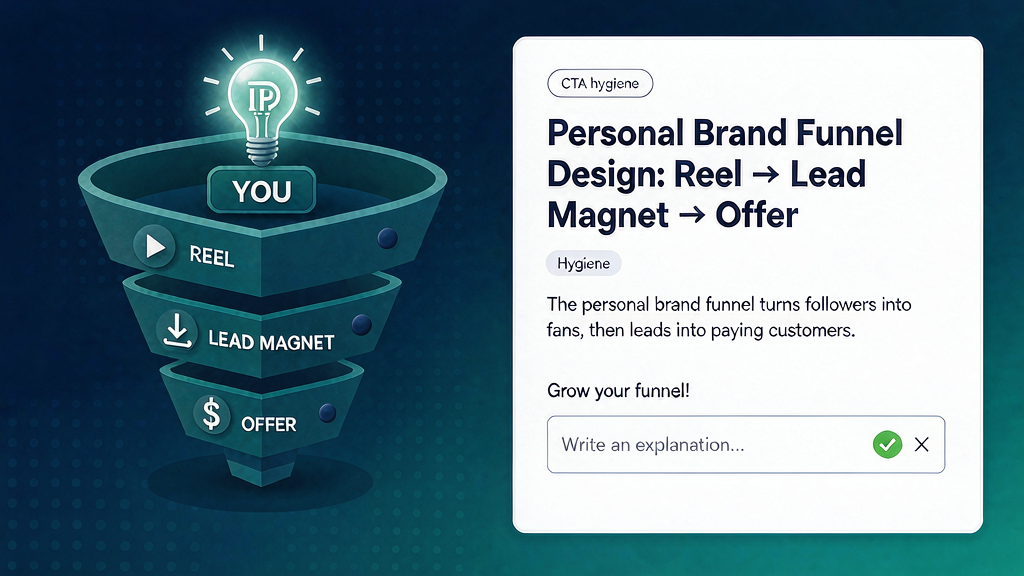
Personal Brand Funnel Design: Reel → Lead Magnet → Offer To create an effective personal brand funnel, you need to design a three-stage process that aligns with your audience's needs and provides value at each step. This process consists of creating a Reel that grabs attention and teaches, a lead magnet that deepens understanding and commitment, and an offer that provides transformation and paid solutions. By focusing on congruence and clarity, you can create a funnel that feels authentic and helpful to your audience.
What Makes a Strong Personal Brand Funnel? A strong personal brand funnel is built on a foundation of clarity, consistency, and value. It's essential to understand the job each stage needs to do and how they work together to create a cohesive experience for your audience. This section will explore the key elements of a strong personal brand funnel and how to design each stage for maximum impact.
Stage 1 — Reel (Attention + Teach): How to Create a Saveable Change in Understanding The first stage of your personal brand funnel is the Reel, which aims to create a saveable change in understanding for your audience. This means focusing on one key outcome per Reel and using a soft call-to-action (CTA) to direct viewers to your lead magnet. To achieve this, consider the following best practices: Focus on one key message or outcome per Reel Use a clear and concise format to convey your message * Include a soft CTA, such as a comment template or link-in-bio, to encourage viewers to take the next step
Stage 2 — Lead Magnet (Commitment + Deeper Teach): How to Create a Useful Artifact The second stage of your personal brand funnel is the lead magnet, which aims to continue the job started in the Reel and provide a useful artifact, such as a checklist, script, or scorecard. To create an effective lead magnet, consider the following: Deliver your lead magnet quickly and make it easy to access Include a short explainer on how to use the artifact, focusing on teaching rather than pitching * Ensure your lead magnet is aligned with your Reel and offer, using the same language and visual persona
Stage 3 — Offer (Transformation + Paid): How to Implement a Solution with Your Audience The third stage of your personal brand funnel is the offer, which aims to provide a transformation or paid solution to your audience. To create an effective offer, consider the following: Ensure your sales page reuses the language and visuals from your Reel and lead magnet Embed a proof explainer to demonstrate the value of your offer * Be honest and transparent about pricing and guarantees
Congruence Checklist: Ensuring Alignment Across Your Funnel To ensure your personal brand funnel is effective, it's essential to maintain congruence across all three stages. This means using the same framework, promise wording, visual persona, and primary metric of success throughout. Use the following checklist to ensure alignment: | Element | Reel | Lead Magnet | Offer | | --- | --- | --- | --- | | Framework | Same framework name | Same framework name | Same framework name | | Promise | Same promise wording | Same promise wording | Same promise wording | | Visual Persona | Same visual persona | Same visual persona | Same visual persona | | Primary Metric | Same primary metric | Same primary metric | Same primary metric |
Mapping Reel Types to Your Funnel: How to Create a Cohesive Experience Different types of Reels can be used to create a cohesive experience for your audience. Consider the following examples: Myth-bust Reels can be followed by a lead magnet that corrects the myth Wrong vs right Reels can be followed by a template for the "right" approach Mini-lesson Reels can be followed by a checklist expanding on the steps Objection crush Reels can be followed by an FAQ and offer
Measuring the Effectiveness of Your Funnel: What to Track and Why To optimize your personal brand funnel, it's essential to track key metrics at each stage. Consider the following: 1. Reel metrics: saves, CTA conversion to lead magnet 2. Lead magnet metrics: open/use rate, reply quality 3. Offer metrics: close rate, refund reasons Focus on optimizing the weakest link in your funnel, rather than simply buying more Reel views.
Cadence and Production: How to Keep Your Funnel Alive To keep your funnel alive and engaged, consider the following cadence and production strategies: Release 2-4 funnel-aligned Reels weekly Keep your lead magnet always available Launch or use evergreen carts for your offer, ensuring integrity and consistency Batch board your Reels to ensure the funnel never goes dark when you're delivering client work
Worked Example: Creating a Personal Brand Funnel for a Fitness Coach Let's say you're a fitness coach who wants to create a personal brand funnel to attract new clients. Here's an example of how you could design each stage: Reel: Create a Reel that showcases a quick and effective workout routine, using a soft CTA to direct viewers to your lead magnet Lead Magnet: Offer a free workout plan and nutrition guide, including a short explainer on how to use the plan * Offer: Provide a paid coaching service, including personalized workout plans and nutrition advice, with a sales page that reuses the language and visuals from your Reel and lead magnet
Ship Checklist: Ensuring Your Funnel is Ready to Launch Before launching your personal brand funnel, use the following checklist to ensure everything is in place: Reel: script, storyboard, and visuals are complete Lead Magnet: artifact is created, and explainer is written Offer: sales page is complete, and pricing and guarantees are clear Congruence: framework, promise wording, visual persona, and primary metric are aligned across all three stages Metrics: tracking is set up for each stage Cadence: release schedule is planned, and batch boarding is complete
Related reading on Scro
- How to Build a Personal Brand With Explainer Reels (Not Just Selfies)
- Personal Brand IP Monetization: How Creators Turn Expertise Into Income
- Personal Brand Storytelling Beats That Still Teach Something Useful
- Pricing Your Personal Brand Content Packages for Sponsors
Soft close — storyboard-first workflow
Prefer concept → storyboard → approve stills → render over prompt-and-pray generation. If you want that loop productized, try Scro. The operating rules above still apply with any stack that lets you lock beats before motion credits burn.